Showing posts with label DIY. Show all posts

Sunday, January 12, 2014

COMPLETED - TARTAN CIRCLE SKIRT

 Skirt - Handmade
Top - Zara 
Shoes - Dr Martens
          I finished my circle skirt yesterday. It was my second circle skirt but i made the whole skirt by myself this included inserting my first zipper and doing the circular hem. 
          I loosely followed this tutorial it was useful for showing you how to make the pattern for the skirt but for sewing the skirt I relied on advice from mum as the video was a little vague. I added interfacing to the waistband and stay stitched the hole in the middle of the skirt so that it didn't warp out of shape. I was going to use a rolled hem foot to do the hem of the skirt but as it as my first time i found it hard to control the rolled hem foot around the curves so i just rolled it twice by hand, pinned the hem and then pressed the hem.
          Overall I am very happy with my skirt as I had wanted a tartan skirt but most shops had them in kilt shapes which don't suit me or I just didn't like the fabric. 

Wednesday, October 23, 2013

COMPLETED - BOBBLE HAT


     I finished my bobble hat from Farmhouse Knits by Erica Knight. The book was written for the amy butler sweet harmony wool but when I was in london we went to liberty and I picked up the softest alpaca wool it was rowan alpaca chunky in wren. It is a similar thickness to the sweet harmony wool and I liked this hat pattern so I decided to make it. 
     I knitted in the round but used 5 needles instead of 4 because it made the pattern easier to do. The cabling wasn't bad either. Cabling in the round wasn't too difficult you just have to follow the pattern carefully. It didn't take long to knit either. The pattern specifies 2 balls of wool but I only used around a ball and a half. I think that is because I decided not to make the pom pom for the end of the hat.

Issey

Monday, September 9, 2013

DIY JAPANESE BOOK COVER

          Hello! I haven't blogged since 19th august. This is because we went away very shortly after this for a last minute holiday to CALIFORNIA and this week I have been back at school which I needed to adjust to.
          Every year at school they give us homework diaries. The design is never great. They always feature peoples art work on them but the artwork never goes with the schools branding. It's a mess. And if i'm using something everyday then it has to be pretty! So I came up with this diy!


You will need

A notebook
Origami Paper
White Acrylic Paint
PVA glue
*I did another 2 coats of white paint over this*
1. Paint your notebook with the acrylic paint. It will give a good base for the paper to go on. If you skip this step and you use light coloured paper you might be able to notice what was underneath. My notebook took about 3 coats and an extra coat of paint on the darker area.

2. Measure your notebook. My notebook was 14cm by 21cm. You need to find a common factor. The common factor of 14 and 21 is 7. But a 7 by 7 inch square would be too big! So i did 3.5cm squares on my notebook. Calculate how many squares you will need. Measure carefully and cut these out of your origami paper. You can use as many different papers as you like. I used 2.

3. Glue your squares to your notepad carefully. Let it dry.

4. Seal the notebook by painting with pva glue watered down a little or using modge podge. I used modge podge matte.

Now you have a new notebook that was easy to make!

Issey
xxx

Saturday, August 10, 2013

COMPLETED - SUBVERSIVE CROSS STITCH

I finished my cross stitch. The pattern is from the book
. This was one of my favourite designs because of the cute rabbits and birds with the bold message on the front. I think it's exactly what cross stitching needs to modernise it and bring a new audience to the craft. Teenagers don't want to cross stitch cherubs and clouds.
This is it in the loop I was working it on. I highly recommend the book for anyone who enjoys cross stitch but is stuck on patterns. I like how cute it is when you first see it then you realise what is has to say.


Issey
xxx


Wednesday, June 19, 2013

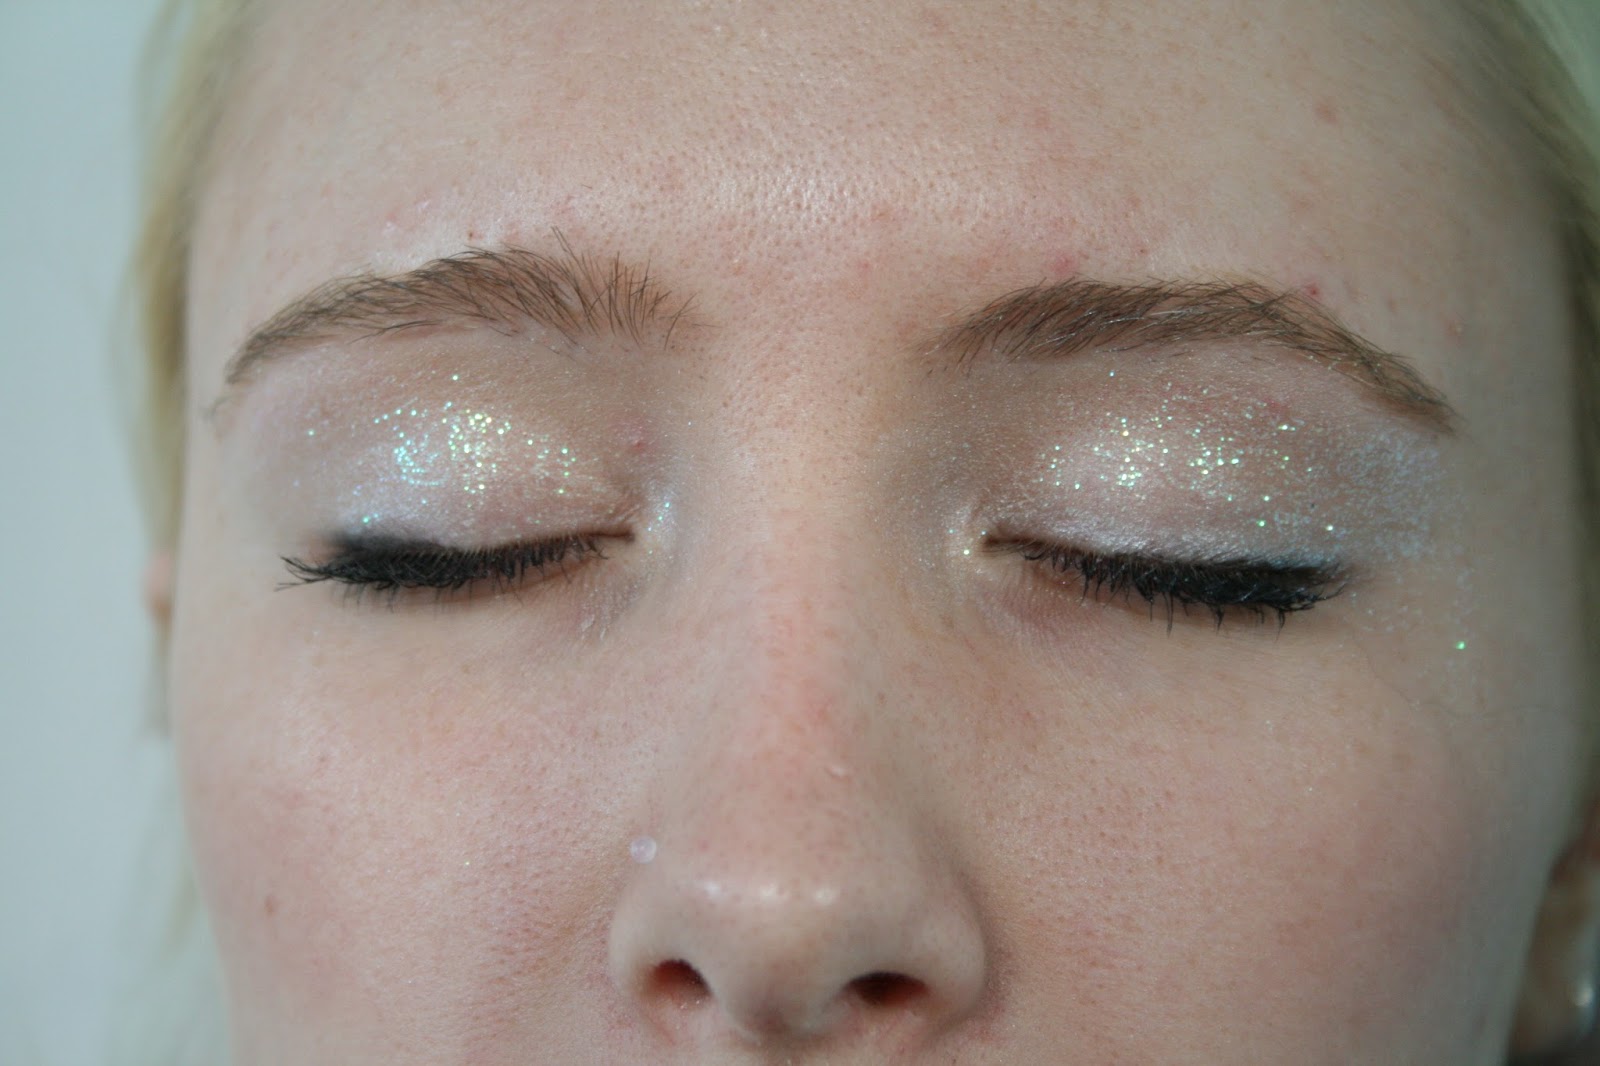
GLITTER EYES

So I mentioned that I went to the Isle of Wight Festival. I did my eyes like this for the festival but before I went I made a tutorial and my sister modelled for me.

You will need

  • highlighter or a shimmery eye shadow preferably creamy.
  • Fine Glitter
  • Medium Glitter 
  • Chunky Glitter
  • silver eyeliner.
  • Vaseline
1. Put the highlighter/creamy eyeshadow on you eyelids up to your brow bone and diagonally from the end of your eye to the edge of your eyebrow. The highlighter will be moist so it will help the glitter stick and stay on your eyelid for longer than it it was applied to a clear eyelid.


2. I used my finger to put the fine glitter all over the eyelid.


3. With your medium glitter apply it diagonally on the area from the edge of your eye to the edge of your eyebrow. Also use your silver eyeliner on the corner of you eyes and across the eyelashes in a line if your want to.


4. Apply vaseline around the eyes where you would like the glitter to be. Dip your finger into the glitter and tap it onto your face. Repeat this until all the areas are covered.

You are done.


This is an easy tutorial to vary. This was another glitter eye look we did on me whilst we were doing the silver eyes. It used the same steps of highlighter but we didn't use the chunky glitter just covered my eyes in the medium glitter. I hope you have fun doing glitter eyes. When I did it for the Isle of Wight festival i got a lot of compliments and a few people asking me where I had them done. If you do your eyes like this tag me on instagram @isseymaya as i would love to see!

Issey 

Tuesday, February 12, 2013

Floating Cranes...


Hello
 So I saw this picture on tumblr and I loved it! I am a serial crane maker. I will just sit and make lots at a  time or none at all. So when I saw the picture I knew I had some cranes around the house so I dug them out and started to think how I was going to do it.


1. I used 5 cranes you can use more or less. Decide on an order. You will also need a sharp needle and some white thread.


2. Knot your thread and push a needle through the cranes hole at the bottom. The needle will poke through the top at the centre. Stitch around the top in to secure.
3.When the base crane is fully secure thread another crane onto the garland using the process above. Choose your spacing between the cranes i chose 7cm. Hold the crane at a 7cm spacing and pinch it to hold it there sew as you did the other until its secure continue doing this until all cranes are on the garland.

4.When all the cranes are on the garland leave a length of thread long enough for you to hang it up.. TA DAA you are done.
This is the garland in my room.

Love 
Issey
xxx